Overview
The Property Manager (PM) Portal gives you a real-time view of all pest control service requests across your portfolio. From the main Services dashboard, you can monitor active requests, search by address or pest type, filter by status or date, and drill into individual work orders — all in one place.
Quick Reference
-
Access: Log in at portal.pestshare.com with your Property Manager credentials - using your team email & the assigned password
-
Main Navigation: Services, Settings, Logout — located in the top right corner
-
Dashboard Columns: # ID, Status, Address, Pests, Last Updated Date
-
Status Dots: Green dots indicate progress stages — the more green dots, the further along the service
-
Built-in Tour: The portal includes a 10-step guided tooltip tour to walk you through each feature
The Services Dashboard — Summary Tiles
At the top of the Services page, you will see four summary tiles that give you an instant snapshot of your portfolio's activity.
-
Active Doors — The total number of currently active units enrolled in Pest Share (e.g., 4,268 Active Doors out of 4,468 Total Doors).
-
New Services — Requests that have been submitted but not yet assigned to a provider (e.g., 3 New Services).
-
In Progress Services — Requests that have been assigned and are actively being worked on (e.g., 228 In Progress Services).
-
Completed Services — Requests that have been fully resolved and closed (e.g., 4,283 Completed Services).
Searching and Filtering Your Services
Below the summary tiles, you will find three tools to help you quickly locate specific requests.
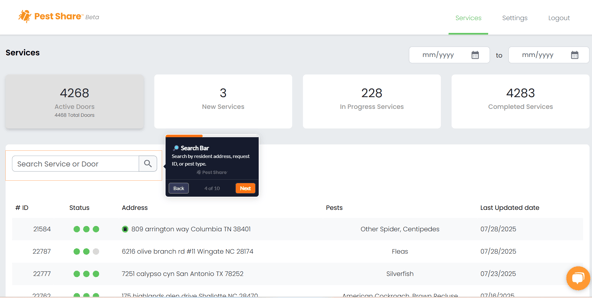
Search Bar
-
Located on the left side, below the summary tiles.
-
Search by resident address, request ID number, or pest type.
-
Results filter instantly as you type.
-
Tip: Use the request ID (e.g., #21584) for the fastest lookup.
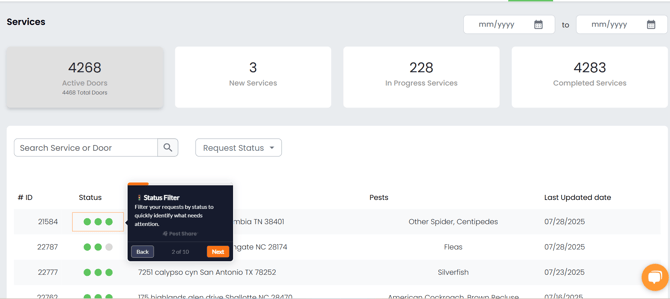
Status Filter
-
Click the Request Status dropdown next to the search bar.
-
Filter your list to show only New, In Progress, or Completed requests.
-
Use this to quickly identify what needs your attention right now.
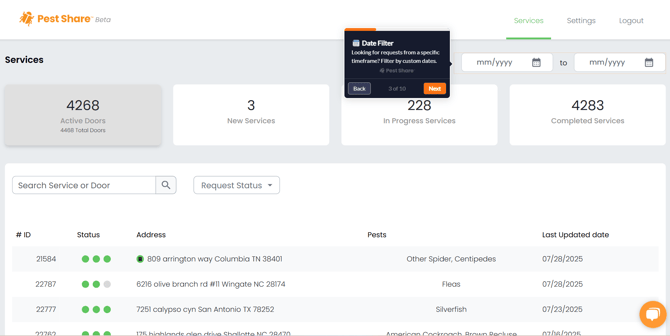
Date Filter
-
Located in the top right corner of the Services page (mm/yyyy to mm/yyyy fields).
-
Filter requests from a specific time period by entering a start and end date.
-
Useful for reviewing activity during a specific month, quarter, or inspection period.
Reading the Services List
Each row in the services list represents one service request. Here is what each column means.
-
# ID — The unique request number assigned by Pest Share (e.g., #21584). Click on a row to open the full request details.
-
Status (Green Dots) — Three dots represent the three stages of service: submitted, assigned, and completed. A green dot means that the stage is done. A gray dot means it has not happened yet.
-
Address — The property address where the service is requested. A small building icon next to the address indicates a multi-unit request.
-
Pests — The pest type(s) reported by the resident (e.g., Other Spider, Centipedes, Fleas, Silverfish).
-
Last Updated Date — The most recent date the request was updated in the system.
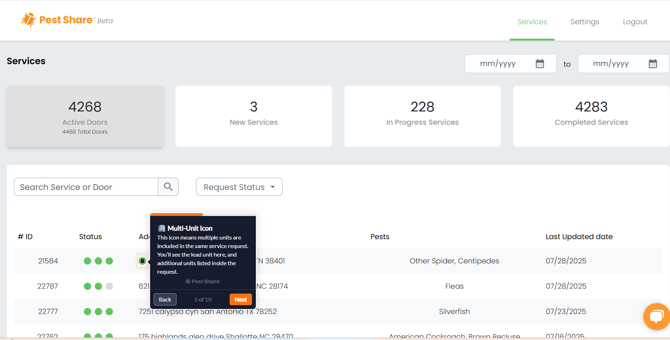
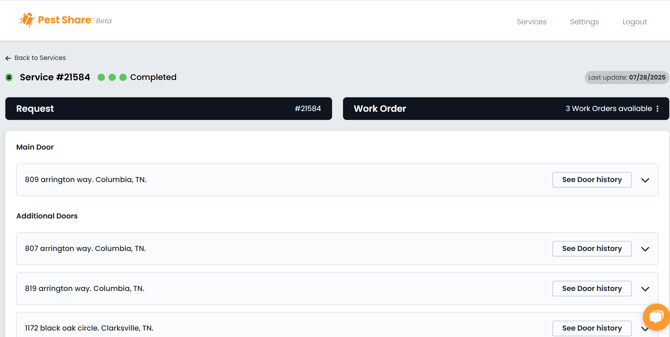
Multi-Unit Requests
When multiple units at the same property are included in a single service request, the portal groups them together under one request ID.
How to Identify a Multi-Unit Request
- Look for the small building icon next to the address in the services list.
- This icon means multiple units are included in the same service request.
- The lead (main) unit address is shown in the list view.
- Additional units are listed inside the request detail page.
Inside a Multi-Unit Request
-
Click on the request row to open the detail page.
-
You will see a Main Door section showing the lead unit address.
-
Below that, an Additional Doors section lists all other units included in the request.
-
Each door has a See Door History button to view the service history for that specific unit.
-
The Work Order panel on the right shows how many work orders are available for the request (e.g., 3 Work Orders available).
Work Order History & Service Details
When you click into an individual service request, you will see a full history log on the left and pest details on the right.
History Log (Left Panel)
-
Shows a chronological timeline of every action taken on the request.
-
Request received — Date and time the request was submitted, and who submitted it (e.g., PM Shaquille Gardner submitted Request #21584).
-
Request delayed — If there was a hold or delay in processing, it is logged here with the date and reason.
-
Request assigned — The date Pest Share assigned the request to a local service provider.
-
Work Order created — The date the work order was generated and assigned to the provider (e.g., WO#19069).
-
Each history entry shows the timestamp, date, and a brief description of what happened.
-
Click the View button next to a request entry to see the original submitted request details.
Pest Details (Right Panel)
-
Shows each pest reported in the request with a photo for identification.
-
Coverage — Indicates whether the pest is covered under the resident's plan.
-
Observed Location and Frequency — Where the resident reported seeing the pest (e.g., Outside, porch/deck, outside doorways) and how often.
-
Multiple pests are listed as separate cards — scroll down to see all reported pests for the request.

Click the link below to view the PM Portal walkthrough
PM Portal Demonstration
Tips for Property Managers
-
🔍 Use the Search Bar First: If a resident calls about their service, search by their address or request ID to pull up the request instantly rather than scrolling through the full list.
-
🟢 Read the Status Dots: Three green dots = Completed. Two green, one gray = In Progress. One green, two gray = just submitted/New. This gives you a quick read without opening the request.
-
🏢 Watch for the Building Icon: If you see the multi-unit building icon next to an address, click in to make sure all units are accounted for and progressing correctly.
-
📅 Use the Date Filter for Reporting: Filter by date range at the end of each month to review all activity during that period — useful for owner reporting or internal tracking.
-
📋 Check the History Log for Updates: Before calling Pest Share about a request, check the History Log first — it often shows exactly where the request is and what has happened so far.
Need Help?
If you have questions about navigating the PM Portal or a specific service request, your Pest Share Client Success Manager is available to help you:
-
Walk you through the portal features by phone or screen share
-
Help you locate a specific request or work order
-
Explain any status, history log entry, or work order detail
Support Resources
-
Help Center: support.pestshare.com
-
Submit a Request: pestshare.com
Pest Share Academy | Knowledge Base Article | pestshare.com